
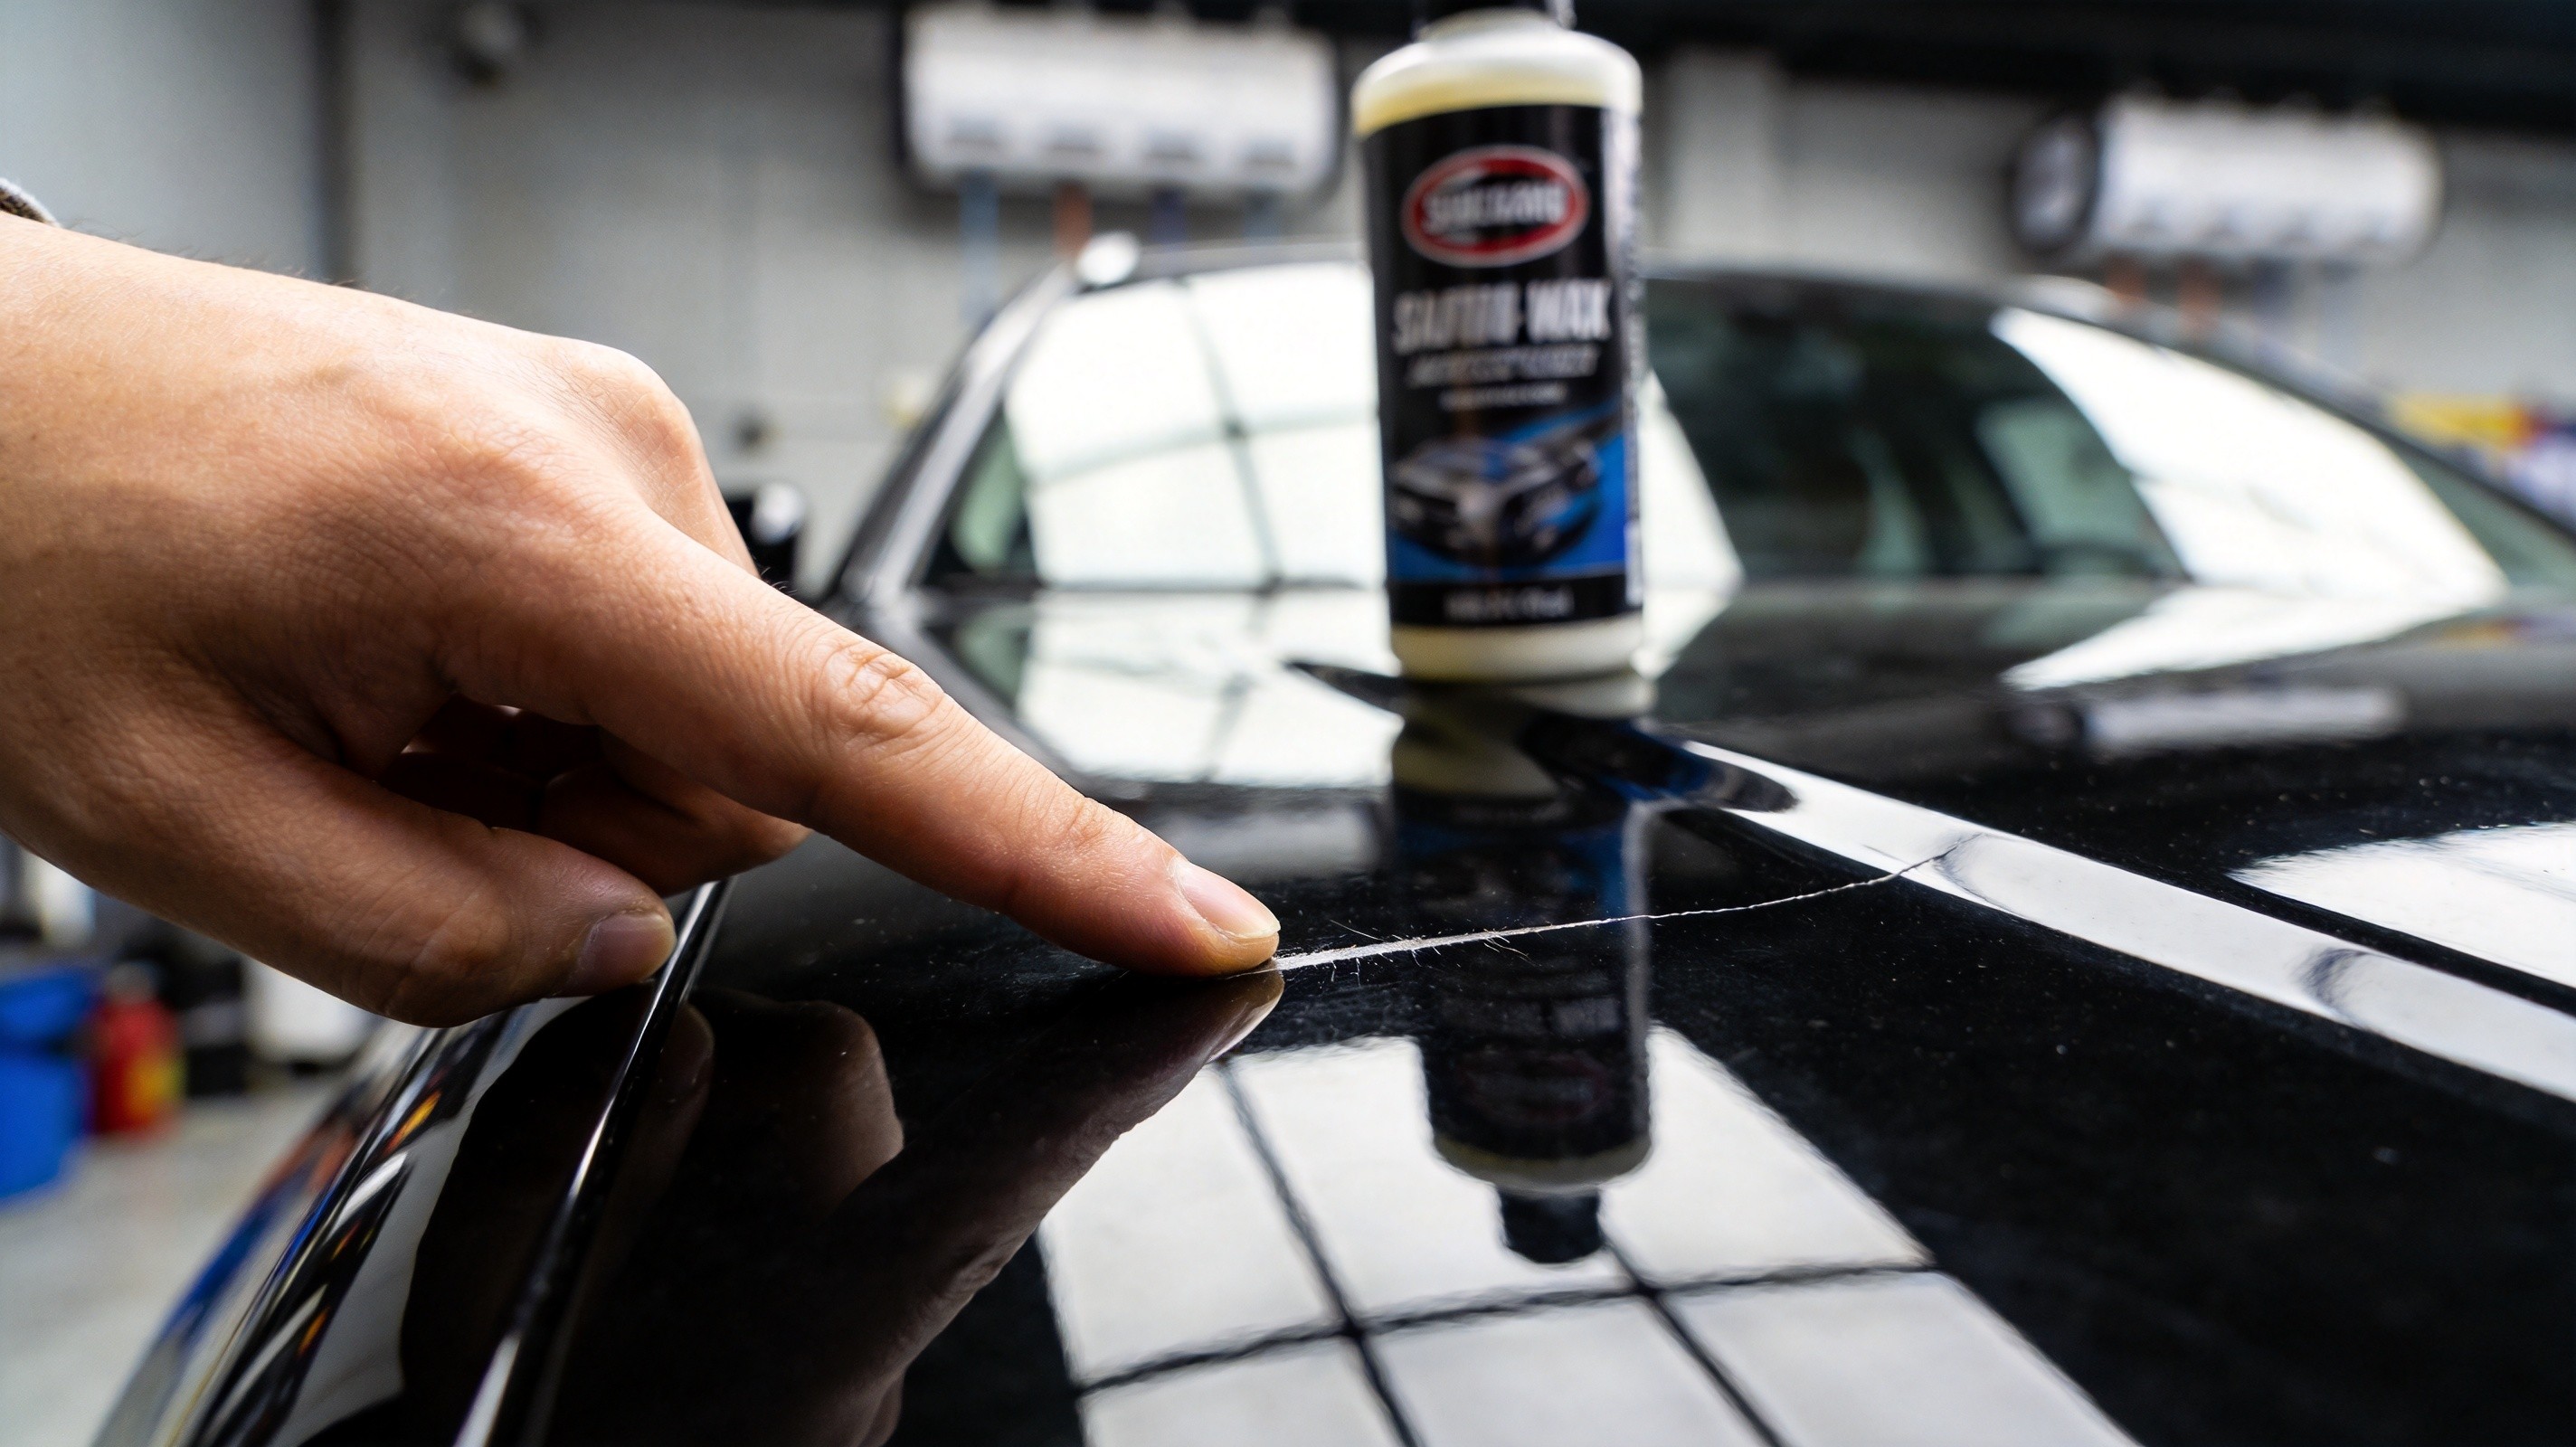
Can Your Car Scratches Be Polished Out? Judge the Depth with Just a Fingernail — Three Methods for Self-Diagnosis
Mysterious new scratches on your car — many people’s first reaction is “go polish it.” But polishing isn’t a cure-all. Some scratches vanish with a light pass; others persist even if you grind down to the clear coat’s limit; and some forcefully polished scratches will simply burn through the paint.
The most important thing before polishing isn’t choosing wax or machine — it’s assessing scratch depth. Knowing how deep the scratch goes tells you whether to polish, how to polish, and what car polishing wax to use.
This article teaches you three techniques: the fingernail test, water test, and visual assessment. None require professional equipment — you can do them all at home.
1. One Fingernail Does It All: The “Fingernail Test” for Scratch Depth
This is the most widely used on-the-spot assessment method in the industry. Simple reason — your fingernail’s tactile sensitivity is far more reliable than your eyes.
How to Do It?
Using your fingernail, scratch horizontally (perpendicular to the scratch direction) across the scratch. Note: scratch across it, not along it. Only horizontal movement can感知 the groove depth.
After scratching, categorize by feel into four levels:
Level 1: Nail slides smoothly, no sensation Extremely shallow scratch, only on the clear coat surface, typically less than 3 micrometers deep. Usually swirl marks or hairline scratches — the mildest paint damage. Medium or fine polishing handles these easily.
Level 2: Slight resistance, but nail isn’t caught Scratch is within the clear coat, approximately 3-10 micrometers deep. Moderate shallow scratches — two steps (medium + fine polish) resolve these.
Level 3: Nail catches slightly, can feel the depression Deeper scratch, approximately 10-20 micrometers, still within the clear coat but approaching its limit. Must start from compounding — all three steps (coarse → medium → fine) are required.
Level 4: Nail clearly catches, strong groove sensation Scratch has likely penetrated through the clear coat into the basecoat or even primer. Depth exceeds 20 micrometers. These scratches cannot be fully removed by polishing — proceed with touch-up paint or repainting.
The essence of the fingernail test is “horizontal.” Running your nail along the scratch direction, you can’t detect even deep scratches. Always go perpendicular.
2. Spray Some Water: The “Water Test” for Scratch Depth
The water test pairs with the fingernail test for double verification. The principle is very intuitive — water fills the microscopic gaps in scratches, changing light refraction.
How to Do It?
Spray water on the scratch or wipe with a wet cloth, then observe the change:
- Scratch disappears or significantly fades → Scratch is within the clear coat; water fills the micro-cracks, restoring normal light refraction. Can be removed by polishing.
- Scratch unchanged, no color difference → Scratch has penetrated through the clear coat into the basecoat or deeper; water’s refractive index can’t compensate for such deep grooves. Polishing cannot fully repair.
Why is the water test accurate? Water’s refractive index is about 1.33, close to the clear coat’s refractive index (~1.5). When scratches are within the clear coat, water fills them and light “thinks” the surface is flat — the scratch becomes “invisible.” But when the scratch penetrates through the clear coat, water’s refractive gap can’t bridge it.
An experienced detailer once told me: “When you’re unsure if something can be polished, spray some water and look. If water can ‘fix’ it, polishing definitely can. If water can’t ‘fix’ it, don’t fight with the clear coat.”
3. Use Your Eyes: The “Visual Assessment” for Scratch Depth
Under natural light or a strong flashlight, observe the scratch area from different angles. A 45-degree angle provides the best viewing angle, maximizing scratch detail visibility.
Based on visual characteristics, you can roughly estimate depth:
| Scratch Appearance | Depth Assessment | Layer |
|---|---|---|
| White hazy marks, disappear when wet | Very shallow (<3μm) | Clear coat surface only |
| Slightly lighter color but same as body | Relatively shallow (3-10μm) | Within clear coat |
| Different color visible (gray/white/black primer color) | Deep (>20μm) | Penetrated clear coat |
| Silver or metallic sheen visible | Very deep | Metal layer exposed |
Key knowledge point: Why do shallow scratches look white?
The clear coat is transparent. When scratched, the mark creates countless tiny irregular refraction surfaces. Light hits these and scatters rather than reflecting directionally — what your eyes see is “whitening.” Pour water on it, and the water fills these micro-cracks, light reflects uniformly again, and the white mark temporarily disappears.
If you can see gray, white, or black (different from your car’s color) at the scratch — that’s primer exposed. If you see silver metallic sheen — congratulations, you’re looking at your car’s metal body panel. Neither of these situations is within polishing’s scope.
4. Hard Standards: Can It Be Polished or Not?
After cross-verifying with the fingernail test, water test, and visual assessment, you need a clear decision standard.
Five Criteria for “Can Polish”
- Fingernail slides across without catching or only slight catching
- Water spray makes the scratch disappear or significantly fade
- Scratch color matches the body (just whitish haze)
- No primer color visible (gray/white/black)
- No metal exposed, no rust
All five met → Polish with confidence.
Five Red Lines for “Cannot Polish”
- Fingernail clearly catches with strong groove sensation
- Water spray has absolutely no effect on the scratch
- Primer color or metallic sheen visible to the naked eye
- Scratch area has begun rusting
- Clear coat thickness below 30 micrometers (requires thickness gauge)
Any single one → Don’t force it. Either touch up the paint or have a professional shop assess it.
5. Don’t Overlook a Prerequisite: How Much Clear Coat Remains?
When judging if a scratch can be polished, there’s another easily overlooked factor — how much clear coat is left.
The clear coat is what polishing works on. Each polish removes a layer — compounding removes about 3-5 micrometers per pass, refining removes 1-2 micrometers. Once the clear coat is gone, below it is the basecoat, and further grinding hits the primer.
Clear coat thickness varies significantly by car origin:
| Origin | Clear Coat Thickness | Safe Polish Count (Lifetime) |
|---|---|---|
| Japanese (Corolla, Fit, etc.) | 25-35μm | About 4-6 times |
| German (BMW 3 Series, Audi A4, etc.) | 40-60μm | About 6-10 times |
| American (medium) | 35-50μm | About 5-8 times |
Japanese cars have inherently thinner clear coats, leaving less room for polishing. If your Japanese car has already been polished 3-4 times and then gets a deep scratch, there may genuinely not be enough clear coat left.
A habit recommendation: measure with a paint thickness gauge before each polish, building a clear coat thickness record. You don’t need to measure the entire car every time — focus on frequently polished areas. These gauges cost a few dozen dollars and save you from unknowingly grinding through the clear coat.
6. Treatment Direction by Scratch Depth (Overview)
After knowing scratch depth, the treatment direction is roughly:
| Scratch Depth | Severity | Treatment Direction |
|---|---|---|
| <3μm (hairline / swirl marks) | Very shallow | Fine polish/finishing + protection wax |
| 3-10μm (shallow scratches) | Relatively shallow | Medium → fine polish, two steps |
| 10-20μm (deeper scratches) | Deep | Coarse → medium → fine, three steps |
| >20μm (penetrated clear coat) | Deep | Touch-up paint / repaint, then polish after drying |
| Metal visible / rusted | Very deep | Body repair → touch-up → polish |
Core principle in eight words: “Use fine whenever possible.” If two steps suffice, don’t use three. If fine polish can handle it, don’t go to coarse. Every compounding pass consumes clear coat — and that’s irreversible.
The complete treatment process, pad-wax pairing, and speed parameters for each scratch level will be covered in detail in future articles. Today, let’s first get “can it be polished” right.
7. Practical Product Pairing Logic
After assessing scratch depth, choosing the right products is the next step. Here’s the basic pairing logic:
Shallow scratches (nail doesn’t catch): Go straight to medium polish or finishing agent. For example, DianYe J3 3-in-1 Polishing Wax (medium cut), 3-10 micrometer abrasive particles, paired with DA dual action polisher + fine foam pad — one pass at medium-low speed usually handles it. For swirl marks only, DianYe J5 Mirror Finish Restorer (fine polish) with ultra-fine foam pad is sufficient.
Moderate scratches (nail catches slightly): Must start from compounding. DianYe J2 Water-Based Polishing Wax (coarse cut), abrasive particles over 10 micrometers, paired with short wool pad or hard foam pad to level the scratches first. Then J3 medium cut wax to transition and remove marks, finally J5 Mirror Finish Restorer for gloss. Three steps — don’t skip any.
Post-treatment protection: After polishing, the paint is in a “naked” state and must be protected immediately. Use DianYe X1 Quick Liquid Wax for fast shine and protection — spray on and wipe even; one 500ml bottle lasts many applications.

Remember the pairing iron rule: coarse wax with hard pad, fine wax with soft pad. Coarse cut wax with a soft pad will “slip” and lack cutting force; fine finishing agent with a wool pad will leave new swirl marks.

Common Pitfalls
With scratch treatment, 70% of problems come from “not assessing clearly before starting.” Not all scratches need polishing, and not all scratches can be polished. Spend two minutes running your fingernail across, spraying water, and shining a light — figure out the depth before deciding on the approach. This is a hundred times better than diving in blindly and burning through the paint.
After assessment, if it’s confirmed polishable, then consider which machine, which pad, which car polishing wax, and what speed. The order cannot be mixed up.
For detailed treatment processes and pad-wax pairing specifics by scratch depth, DianYe Auto Technology will cover each in detail going forward. Follow DianYe, avoid detours.