
Chrome Trim Oxidized and Dull? Full Hand-Polishing Guide with Automotive Polishing Wax — 4 Steps from Assessment to Protection
 Chrome trim polishing and restoration — temperature and pressure control determine success or failure. Just like paint polishing, rushing the process is how mistakes happen.
Last week, I helped a friend restore the chrome grille trim on his 2008 Honda Accord. The car had been parked under a tree for over six months without care, and the chrome surface was completely covered with a dull grayish film. It felt rough to the touch, with zero mirror-like reflectivity left.
He was planning to replace the trim. The dealer quoted $250 for a single chrome grille piece — he didn”t think it was worth it.
I told him: Don”t rush to replace it. It most likely hasn”t reached the blistering stage yet. A hand polish should bring it back.
Forty minutes later, all four chrome grille pieces were restored to about 70% of their original condition. The supplies I used were simple — a microfiber cloth, a can of DianYe J1 Cleaning Wax, and a can of X1 Quick Liquid Wax for protection.
Today, I”m going to break down the entire process from start to finish. Whether you”re a DIYer or running a detailing shop, follow along. Chrome polishing isn”t as mysterious as people think, but there are several details that — if overlooked — can ruin a perfectly salvageable piece.
Step 1: Assess How Far Your Chrome Trim Has Oxidized
Chrome oxidation doesn”t happen overnight. It”s a progressive process. Before you touch anything, you need to identify which stage you”re dealing with, because the approach differs significantly.
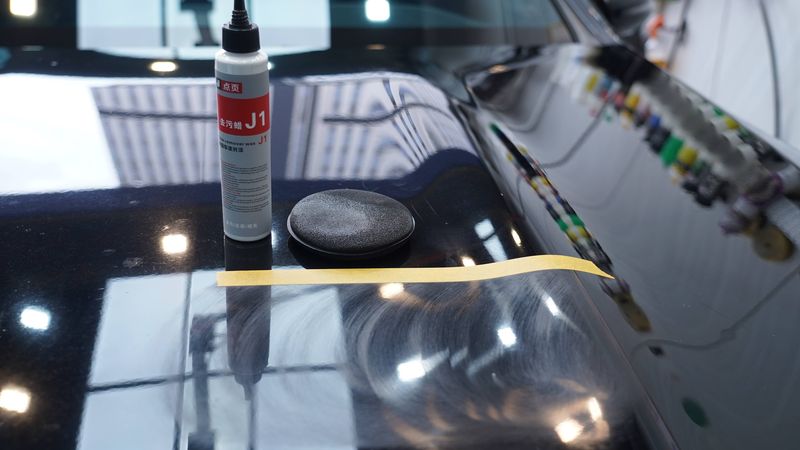
 J1 Cleaning Wax — the go-to choice for hand-polishing light oxidation. Gentle abrasive particles that won”t damage the chrome layer.
Light Oxidation: The surface looks foggy with a grayish-white film, but when you run your finger across it, it still feels smooth. This is the easiest to fix — the passivation layer on the chrome is compromised, but the chrome itself hasn”t been penetrated. Restoration rate is close to 100% with polishing.
Moderate Oxidation: Visible white spots, gray speckles, and localized loss of gloss appear. When you rub your fingertip across the surface, you can feel slight roughness or grittiness. At this stage, the nickel layer within the chrome”s micro-pores is starting to corrode, but the main chrome layer is still intact. Automotive polishing wax with proper technique can still restore it — it just takes more effort.
Severe Oxidation: Large areas of blackening, chrome blistering, or signs of peeling. Honestly, at this point don”t try to fix it yourself. Blistering means the chrome layer has been extensively penetrated, and the nickel or even copper base layer is exposed and actively corroding. Polishing won”t bring it back — it will only accelerate the peeling. The only options at this stage are re-plating or replacement.
A Quick Assessment Method: Gently drag your fingernail across the oxidized area. If it”s dull but smooth with no catching sensation, you”re still in the light-to-moderate range and can handle it as a DIY project. If your nail catches onobvious pits or lifted edges, it”s severe — take it to a professional.
Step 2: Gather Your Supplies
Many people think restoring chrome trim requires a bunch of specialized tools. In reality, for light-to-moderate oxidation, all you need is:
| Step | What You Need | Approximate Cost |
|---|---|---|
| Cleaning | pH-neutral car wash soap + microfiber towel | Free if you already have it |
| Polishing (Light) | White paste toothpaste or DianYe J1 Cleaning Wax | $0-7 |
| Polishing (Moderate) | J2 Water-Based Polishing Wax + DA machine + ultra-soft foam pad | $15-30 (just the wax cost if you own the machine) |
| Protection | X1 Quick Liquid Wax | About $7 |
| Wiping | 2-3 microfiber cloths | $2-3 |
Grand total: under $30. Compare that to $40-100 for re-plating a single chrome piece — hand polishing is absolutely worth trying.
One thing that must be emphasized: your cleaning supplies and polishing supplies must never overlap. You can”t use the same cloth you used on your wheels to wipe chrome trim, and you can”t use the same bucket water for both body panels and chrome. Chrome surfaces are extremely thin — any residual coarse particles will act like sandpaper during polishing and create new scratches.
Step 3: Cleaning — The Step Many Skip but Must Never Skip
The first step in chrome restoration isn”t polishing — it”s thorough cleaning.
Using pH-neutral car wash soap and a soft sponge, wash away all dust, grease, insect remains, bird droppings, and residue from the chrome surface. After washing, dry completely with a clean microfiber towel — don”t let it air dry. Water spots dried on chrome will leave mineral deposits, and you”ll have undone your own work.
What about iron contamination? Some older cars have iron fallout rust spots bonded to the chrome. These won”t come off with car wash soap alone. You can spray on a pH-neutral iron remover and let it react, but never use acidic iron removers. Strong acids will dissolve the chrome”s passivation layer instantly, turning a moderate oxidation case into a severe one.
I typically handle iron spots during the cleaning stage using DianYe J1 Cleaning Wax. J1 is a wipe-on cleaning wax — you apply it and wipe directly with a soft cloth, no waiting required. Its gentle abrasive particles lift surface iron particles without damaging the chrome layer.
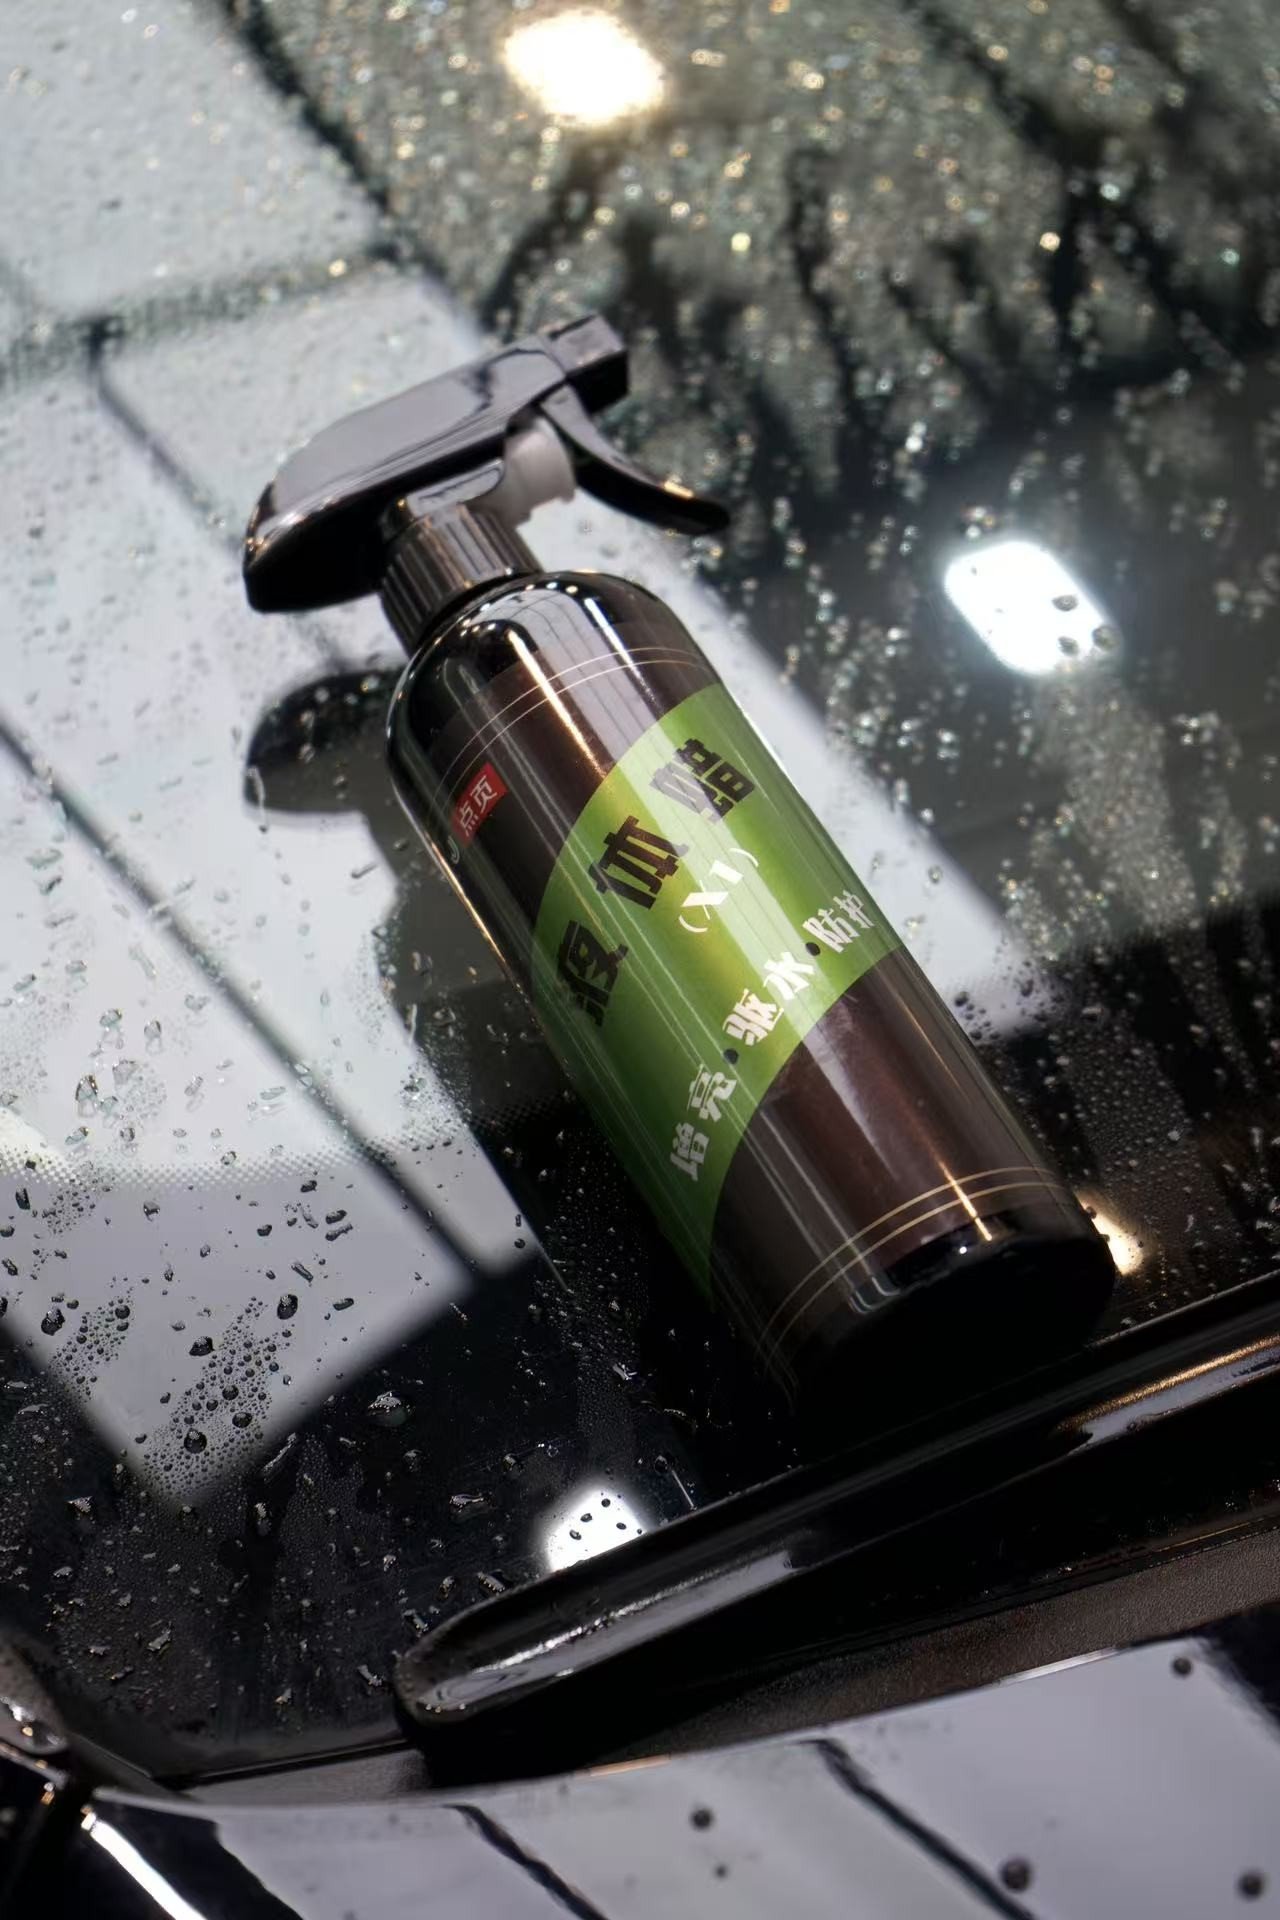 X1 Quick Liquid Wax — the ultimate protection after polishing. Forms a hydrophobic film on chrome to block moisture and air.
After cleaning and drying, run your finger across the chrome one more time to confirm there”s no residual grittiness. Only then is it truly clean. At this point, you can also more accurately assess the degree of oxidation.
Step 4: Hand Polishing — The Core Procedure
This is the most critical step of the entire process. Depending on the oxidation level, I”ll break it into two paths.
Light Oxidation: Toothpaste or J1 Cleaning Wax Direct Application
If you have white paste toothpaste (not clear gel — that has no abrasive particles), the fine abrasives in toothpaste are sufficient to remove light oxidation.
However, I prefer using DianYe J1 Cleaning Wax. Its abrasive particles are specifically designed for paint surface decontamination, and on chrome it”s actually gentler and more controllable than toothpaste. Plus, J1 is applied and wiped directly — no waiting, clean and efficient.
Detailed Procedure:
-
Dispense a pea-sized amount of J1 Cleaning Wax onto a microfiber cloth. Don”t squeeze it directly onto the chrome — loading the wax onto the cloth gives you better control and prevents buildup.
-
Starting from one end of the chrome strip, wipe in a single direction. Single direction — not back and forth. Back-and-forth motion increases the risk of secondary scratches because you”re pushing the dislodged oxide right back into the surface.
-
Work on 3-5 inch sections at a time. Don”t be greedy — go segment by segment. 45-60 seconds per section is sufficient.
-
Watch the residue color on your cloth as you work — dark gray or black means you”re effectively removing the oxidation layer. If the cloth is clean with no color transfer, the oxidation may already be fully removed, or your pressure is insufficient.
-
After completing a section, use a clean area of the cloth to wipe away residue and check the gloss recovery. If it looks good, move to the next section.
-
Once the entire piece is done, go over the whole surface with a clean microfiber cloth to remove all remaining wax and oxide residue.
For light oxidation restoration, a chrome door handle trim takes about 10 minutes, and a chrome grille strip takes about 20-30 minutes.
Moderate Oxidation: A Stronger Approach
For moderate oxidation, hand-wiping with J1 alone may not be enough — the oxidation has penetrated deeper and requires stronger cutting power.
Option A: Enhanced Hand Method
Continue using J1 Cleaning Wax but with slightly more pressure, extending each section to 60-90 seconds. If white spots persist after two passes, switch to J2 Water-Based Polishing Wax — J2 is a coarse polishing compound with larger abrasive particles than J1, offering stronger oxidation removal. However, J2 performs best with a machine; hand application alone is less efficient.
Option B: DA Machine + J2 Polishing Wax
If you have a DA (dual-action) polisher and an ultra-soft foam pad, efficiency increases dramatically.
Procedure:
-
Set the DA machine speed to 1200-1500 RPM — never exceed 2000 RPM. Chrome is only 0.5-5μm thick. High RPM generates heat that causes the chrome and nickel layers to separate due to different thermal expansion rates. This is the number one cause of burning through chrome during polishing.
-
Use an ultra-soft foam pad — never use a wool pad. Wool pads have 3-5 times the cutting power of foam pads. Using wool on chrome is essentially grinding through the chrome layer deliberately.
-
Apply J2 Water-Based Polishing Wax to the foam pad. Work on areas no larger than 20cm² at a time.
-
Place the DA machine on the chrome surface and let the machine”s own weight do the work — don”t apply extra downward pressure. The pressure should be roughly equivalent to the pressure you use when writing with a pencil — “let the abrasive do the work, not the pressure.”
-
Don”t stay in one spot for more than 1 minute. Check every 15-20 seconds — wipe away residue and inspect the result.
-
After polishing a section, let the chrome cool before moving to the next. Use the back of your hand to check the temperature — if it feels noticeably warm, wait for it to cool completely before continuing.
Better to do an extra pass than to over-polish on the first one. There”s no “redo” with chrome polishing — the chrome layer you burn through the first time will never grow back.
Step 5: Post-Polish Protection — Skip This and It Was All for Nothing
Many people spend half an hour polishing chrome trim until it gleams, and then… they stop.
Two weeks later it”s dull again, and they assume all that effort was wasted.
It wasn”t wasted. What happened is you forgot to apply protection.
Polishing removes the oxidation layer on the chrome surface, exposing fresh chrome. But that newly exposed chrome is at its most vulnerable — the passivation layer hasn”t fully rebuilt, and the micro-pores are wide open. If you don”t seal it within 24 hours, moisture, acid rain, and industrial pollutants from the air will penetrate through those micro-pores, and within weeks you”ll see oxidation and dullness returning.
How to Apply Protection:
-
After polishing, wipe the chrome surface with isopropyl alcohol (IPA) or denatured alcohol to remove any oily residue from the polishing compound. Don”t skip this step — grease residue will block the protective layer from bonding to the chrome surface, dramatically reducing its effectiveness.
-
Apply DianYe X1 Quick Liquid Wax as protection. X1 is a spray wax — spray it onto a microfiber cloth, then apply a thin, even layer to the chrome surface. Wait 1-2 minutes for it to haze, then buff to a shine with a clean side of the cloth. X1 forms a hydrophobic protective film on the chrome that effectively blocks moisture and air.
-
After buffing, check for any water marks or wax residue. Go over the surface once more with a clean area of the cloth.
X1”s protective layer lasts approximately 2-3 months on chrome. If you park outdoors, in frequent rain, or in a coastal area, I recommend reapplying monthly. The cost is minimal, but it dramatically extends your polishing results.
If you don”t have X1, a carnauba-based car wax will work too, but its durability won”t match the synthetic formulation of X1, requiring more frequent reapplication.
Common Mistakes to Avoid
Here are the most frequent errors I”ve seen in chrome trim polishing — things people commonly get wrong:
Mistake 1: Using toilet bowl cleaner on chrome. Toilet cleaner is strong acid, pH 1-2. It might dissolve some oxidation on contact, but it completely destroys the chrome”s passivation layer. A few days later, you”ll find oxidation worse than before. For chrome cleaning, always and only use pH-neutral products.
Mistake 2: Using an RO polisher on chrome. Rotary polishers generate concentrated localized heat. With chrome so thin, once heat builds up, the chrome and nickel layers expand at different rates and delaminate — causing blisters. If you”re putting a machine on chrome, it must be a DA machine. Rotary polishers are absolutely prohibited.
Mistake 3: Polishing in direct sunlight or on hot chrome. Polishing compounds and waxes dry too fast on hot surfaces — they cure before you can even spread them evenly, and forced buffing creates scratches. Work in the shade or wait until the chrome is completely cool. Ideal application temperature is 15-25°C (60-77°F).
Mistake 4: Skipping post-polish protection. As discussed above, polishing without protection is wasted effort. Protective wax or sealant must be applied within 24 hours of polishing.
Mistake 5: Trying to DIY severe oxidation. Blistering is blistering — don”t deny it. Two hours of forced polishing will only enlarge the breach and spread corrosion faster. Accept when a piece has reached the point of needing professional treatment. Send it to a shop or replace the part.
Summary
The restoration process for oxidized, dull chrome trim comes down to four steps: Clean → Assess → Polish → Protect.
Light oxidation? Hand-polish with J1 Cleaning Wax. Moderate oxidation? Bring out the DA machine with J2 Water-Based Polishing Wax. Severe oxidation? Send it to a professional — don”t torture yourself. And after polishing, always apply protection with X1 Quick Liquid Wax — this single step determines how long your restoration lasts.
Chrome trim doesn”t have the thick clear coat that paint has, giving you room for error. Chrome is only fractions of a micron to a few microns thick — every operation must be light, slow, and deliberate. Light over heavy — those four words summarize everything I”ve learned from chrome restoration work.
Don”t neglect routine maintenance either — wash and dry your car promptly after rain, apply wax every 2-3 months, and your chrome trim can stay bright for years. Chrome maintenance isn”t difficult. The real challenge is addressing it when it first starts to dull, rather than waiting until full-blown oxidation and blistering before you remember it needs attention.
If you have any questions about chrome trim restoration, feel free to leave a comment below.
DianYe Auto Technology — specializing in automotive paint surface care. J1 Cleaning Wax, J2 Water-Based Polishing Wax, J3 3-in-1 Polishing Wax, J5 Mirror Finish Refiner, X1 Quick Liquid Wax — from coarse polishing to fine finishing to protection, one complete system.